I thought the best place to start would be my favourite Sweet Vanilla Biscuit recipe. I have made these a million times, as my sister demands that I make her a batch every time I go home, and they have never come out badly (even in my horrible french oven). They are delicious, incredibly more-ish and, best of all, they are easy.
However, because we are working with dough and the fact that you will probably have to cook them in batches, they can end up taking a while so give yourself a good couple of hours for preparation, baking and then the all important tasting, afterwards.
I stumbled across this recipe whilst looking for a simple biscuit 'base' recipe that I could go on to adapt and try out different flavour combinations with. Before we get to the 'fancier biscuits', lets cover the basics.
From Good Food Magazine 2005 and I discovered it here (http://www.bbcgoodfood.com/recipes/2798/sparkling-vanilla-christmas-cookies) on the good old BBC food website!
VANILLA BISCUITS
 |
| Lots Of Love |
Difficulty
Easy
Easy
Time
Preparation: 20 minutes
Chilling: At least 30 minutes
Baking: Approx. 10-12 minutes per tray
Preparation: 20 minutes
Chilling: At least 30 minutes
Baking: Approx. 10-12 minutes per tray
RECIPE
- 140g icing sugar ~ sieved
- 1 teaspoons vanilla extract
- 1 egg yolk
- 250g soft butter ~ cubed
- 375g plain flour ~ sieved
- 2 tablespoons of milk (if needed)
*I have listed original recipe above but I usually double this recipe when I cook them. This means you can make a big batch of these all in one go and then store them in a tin for literally weeks and weeks and they will still taste great!
METHOD
- Combine icing sugar and butter. If you are feeling strong you can do this by hand, with a wooden spoon. If not, chuck them in a food processor and whizz until the butter and icing sugar are well combined.
- Add in the vanilla extract and the egg yolk and mix again.
- Now it's time to get your hands dirty!! Add the flour and bring the ingredients together using you hands until you have a firm dough. *If the pastry is feeling a little flaky, add a little milk but do so gradually, this pastry shouldn't be at all sticky!
- Divide the dough up into 4 discs, wrap each one in cling film and refrigerate for at least half and hour.
- Whilst you wait for you dough to chill, you can preheat your oven to 190C (fan ovens) or 170c (gas ovens). If you have an Aga, slide the cool sheet into the top runners of the top oven.
- You can also prepare your baking trays by lining them with greaseproof/baking paper. *I usually use 2 baking trays and rotate them so that whilst one batch is cooking, I can fill the next tray up. This means the cooking process is a little quicker.
- Lightly flour your work surface and rolling pin, then start rolling out the chilled dough. I usually roll my dough out so it's about 1cm thick but if you prefer thinner biscuits, roll it out a little more.
- Cut out what ever shapes you like using cutters and place on your baking tray. *If you don't have cutters you can go freestyle and use a knife. If you are a perfectionist and want perfect rounds but don't have a cutter, grab a wine glass and GENTLY use the rim to cut out circles. Please don't push too hard though, I don't want anyone to get hurt.
- The recommended baking time is 10-12 mins however KEEP AN EYE ON THEM. These little guys burn in a second so when you see the sides turning golden take them out. *Remember, if you rolled you dough out thiner than I suggested, they will cook quicker so maybe have a look at them after 8 mins, just to be safe!
- Once cooked, transfer the biscuits to a rack to cool and pop you next tray in the oven until all the dough is gone. *Be careful when transferring the biscuits as they remain a little fragile until they have cooled!

If you are planning on decorating these biscuits make sure they are completely cool before doing anything with them. But feel free to eat them straight out the oven. I usually lack the self control to wait for them to cool, and they are so good when they are hot.
These biscuits have a subtle vanilla flavour which means you can decorate them in all sorts of ways. My favourite is to use melted chocolate...
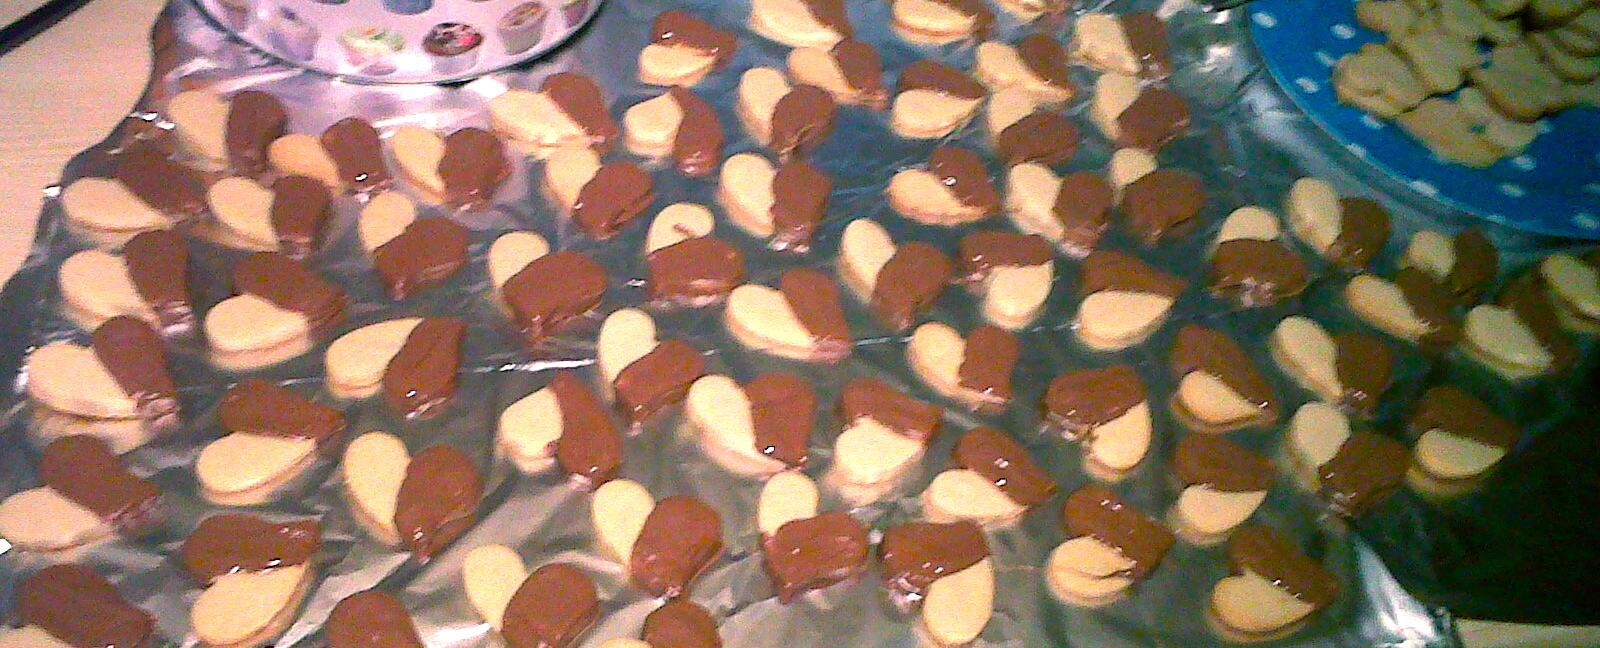 |
| Chocolate Dipped Biscuits |
 |
| Chocolate Drizzle |
Or you can get a bit more creative and using icing to decorate the top of the biscuits...
 |
| Mickey Mouse, Cardinals and Hibiscus Flowers |
 |
| Bees and Hives |
Or maybe try a little bit of construction...
 |
| Vanilla Biscuit Train Carrying Haribo 'coal' and Twix 'logs' |
Even without any extras, these biscuits taste delicious so feel free to keep it simple and leave them plain.
Good luck and have fun
x
I love the cute cookie cutouts and designs on the biscuits. These look so simple and delicious, can't wait to try them out. thanks for sharing =)
ReplyDeleteI'm so glad you like them! Definitely give them a go as they are really, really delicious x
Delete